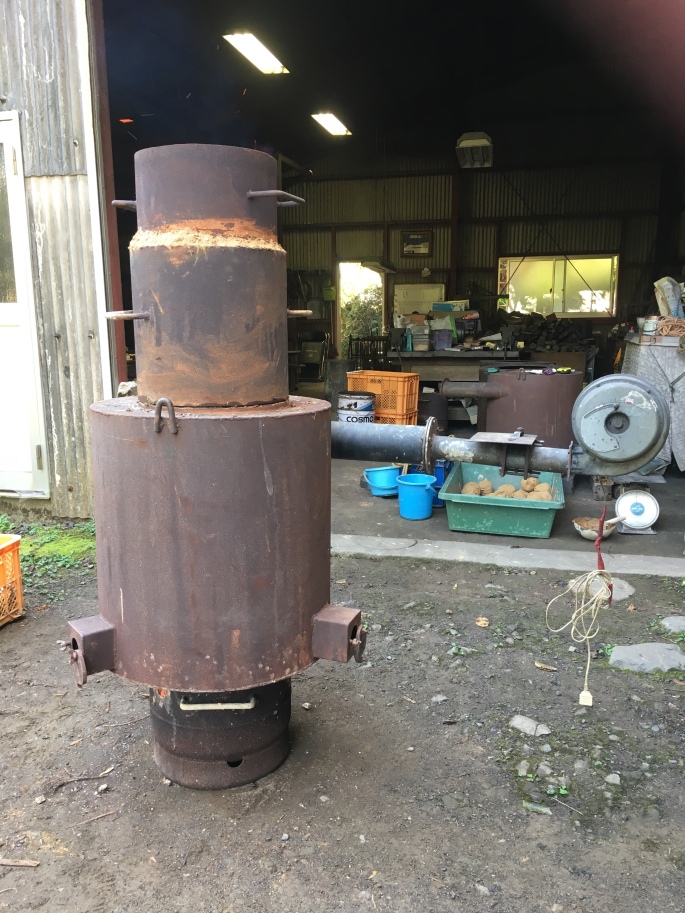
Today we were up early to start the smelt ! The First job was to join the upper two sections to the two parts already assembled. We made a clay putty to go between layers 2 and 3 and then a clay snake to seal the top layer on ( so round the join of 3 and 4).

We then lit a wood fire in the furnace , it is essential to pre heat the furnace. This also drives out any remaining moisture. All 6 air holes ( three in part 1 and three in part 2) are left open to assist the draw of air through the furnace and help it reach higher temperatures. This wood fire was kept burning for 2.5 hours.
In the meantime there were many other jobs to do to prepare for the smelt. The iron sand was mixed with 500g of sieved ash and 2kg of sieved clay powder . This was made damp with water so that when you squeeze it with your hand you can see finger marks. This mix is important to help the slag flow. It also binds with the sand adding some weight to it so it doesn’t rise up and out of the furnace when added, with the thermal movement.

The mix was then weighed into 1kg portions which would be added one at a time to the furnace Along with 1kg of charcoal .
After 2.5 hours the furnace was packed full of wood for a further half hour and then the ash bed was compressed in the bottom of the furnace With a long pole.
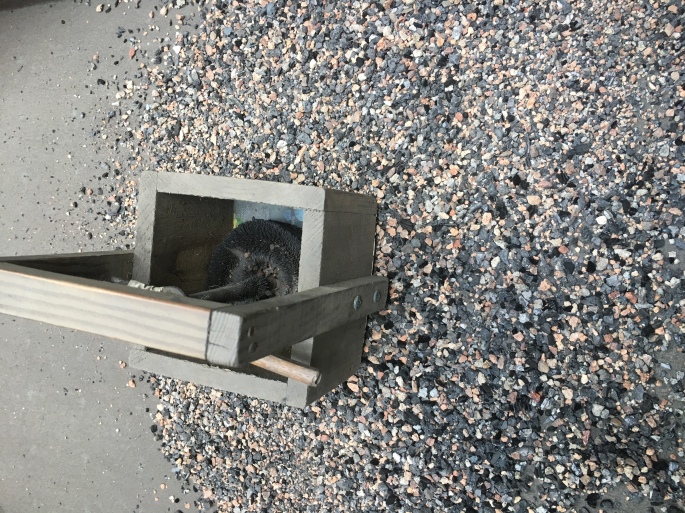
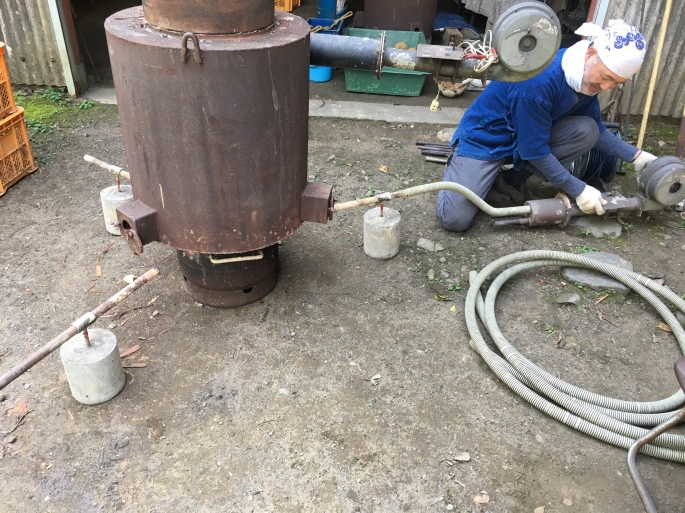
Then the lower three holes were attached to a air feed system using clay. The clay makes a tight seal and also protects the steel pipe the air enters through from melting. The three flaps in part 2 are also now closed.

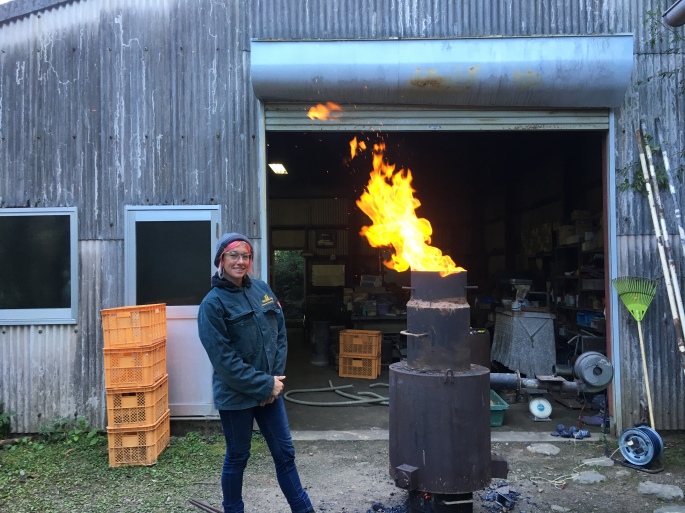
After three hours of preheating with wood we filled the furnace to the brim with charcoal (this took 12 kg) and turned on the lower air source which entered from three points .
Charcoal was then added for a further hour. The pre heating process is very important, we were adding 1kg every 4-6 mins on average.


After this hour pre heating with charcoal the upper air source was also turned on ( about 20% but this will vary from blower to blower. The air flow is very important too much and it will all makes slag and too little and the temperatures can’t be reached for the reaction to happen) .
We now started to add 1kg of iron sand and 1kg or charcoal. The aim was to add this every 4 minutes. As with in Ireland you watch the top of the furnace to see when enough space has been made by the charcoal combusting and so the level at the top dropping enough for the next load to be added. If this is faster or slower than 4 minutes the air source was adjusted accordingly.

At the start the flame is meant to look like sun rise, there is a reddish blue tinge and towards the end like sunset and it turns more orange.
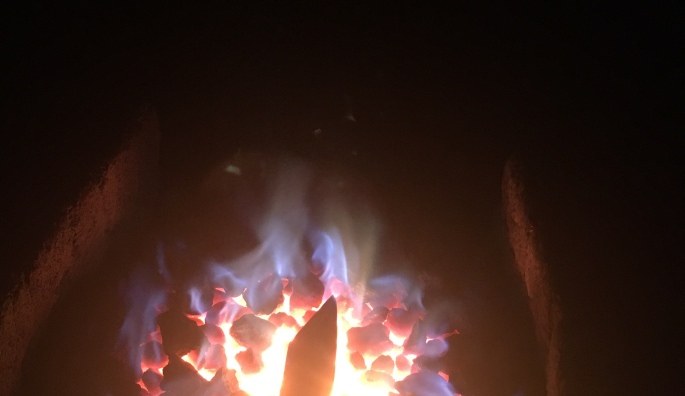
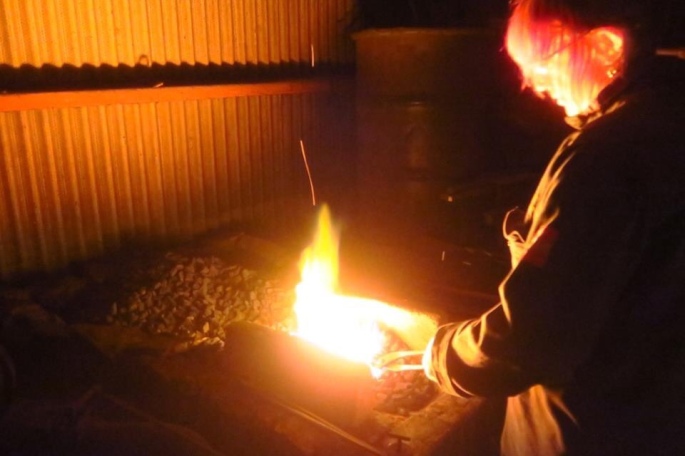
Form now on in it was a lot of work. Not only must iron sand and charcoal be added the air feed holes in part 2 had to be checked to make sure slag hadn’t blocked then. Drips were moved to the side with a steel poker but this has to be done quickly or the heat would escape.
Other things to observe are the shape and colour of the flame. I should be large and bright. You must also listen to hear if any vents are blocked.

The air source to the bottom should be stopped at about the 10th load of iron sand and the holes plugged with clay. After this the flaps in section 2 must repeatedly be checked and cleared from slag drips as this is the only air source.
The top air source should now be turned up so that the pattern of adding sand and charcoal roughly every 4 minutes it retained. It is important to also see if you can see slag pooling up to the level of these holes. If you can it is very important to now tap if off via the lower holes!

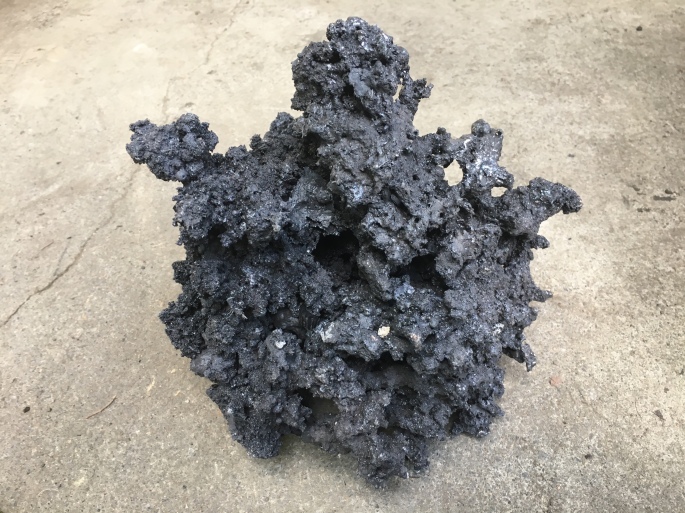
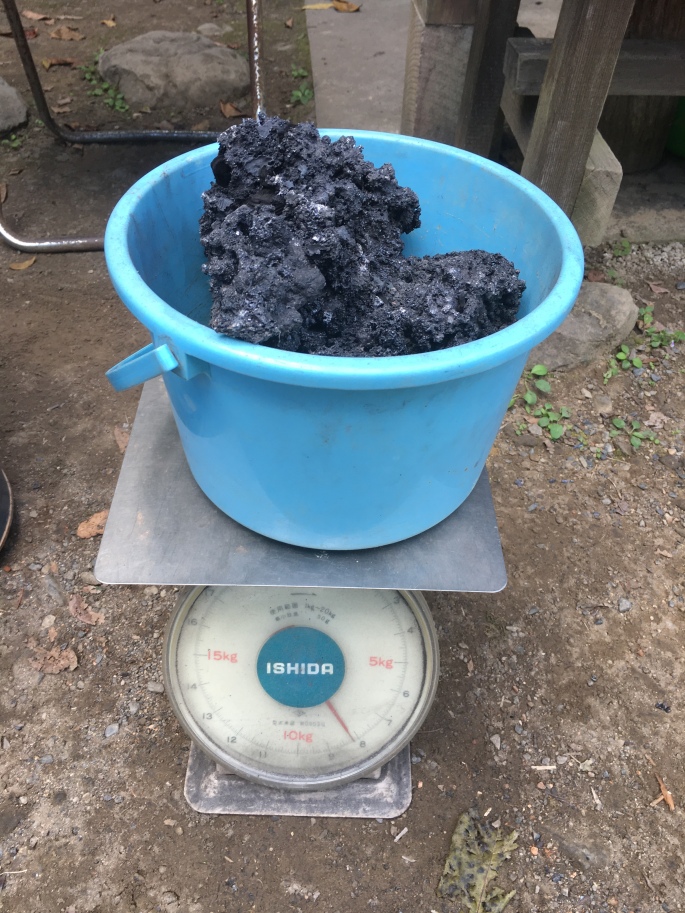
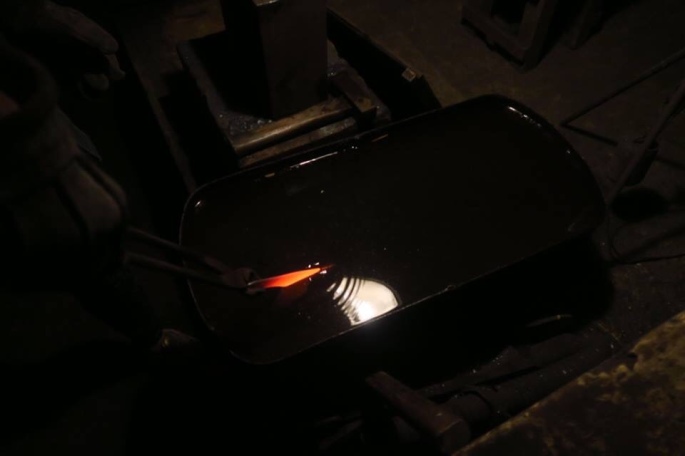
We tapped the furnace multiple times . I was very surprised at how much came out! The amazing thing about this design is that I was able to catch the slag in moulds and so try out my casting idea! And I worked! I was very happy with these results.


This process of adding sand and charcoal was repeated 27 times ( we used about 22 kg of iron sand plus the other materials and water added made it up to about 27kg)

Once all the sand mix had been added we continued to tap regularly . A further 2kg of charcoal was added after this and it was left to burn down with the air feed still attached and on until charcoal level burnt down to near the top of part 2.
The top two sections are taken off at this point and the whole furnace left overnight to continue to burn down and cool down.


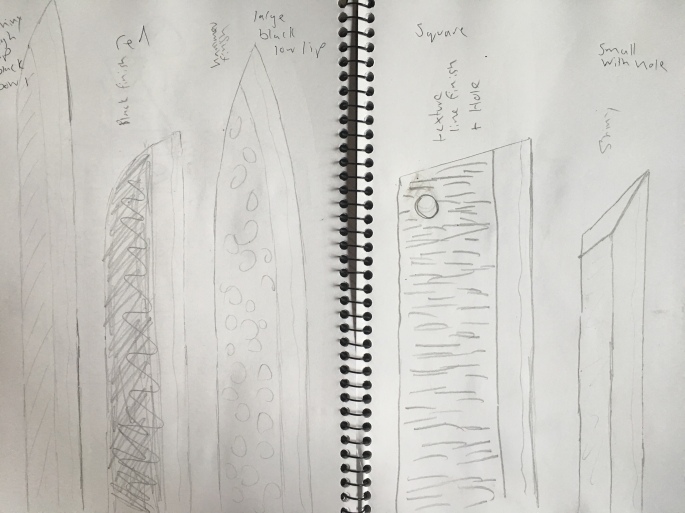
 Over the last few days I have been finalising the shapes of my five knives which will be the central features to the small Japanese garden inspired sculptures I am making.

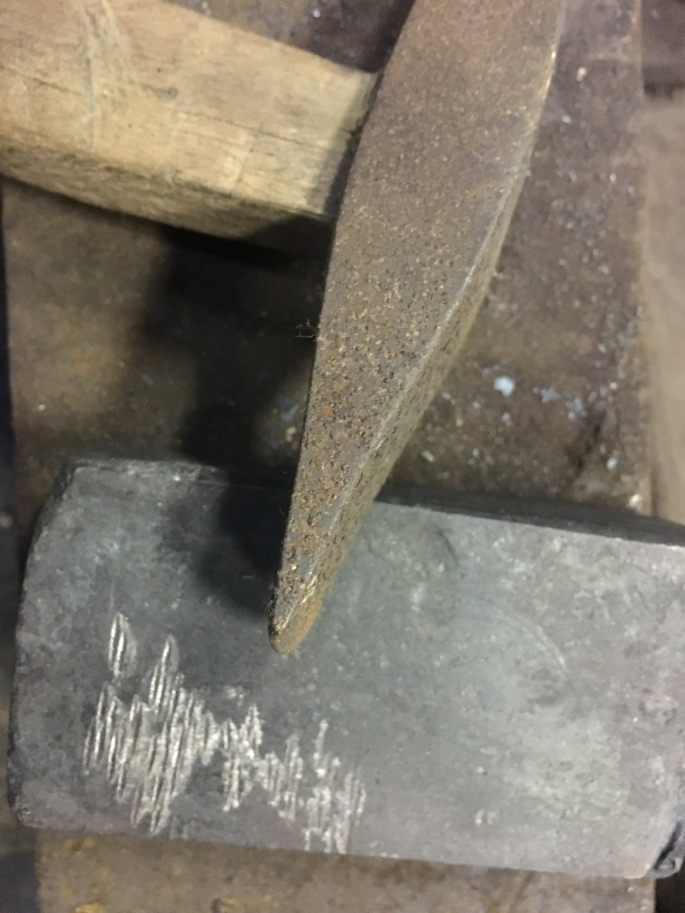


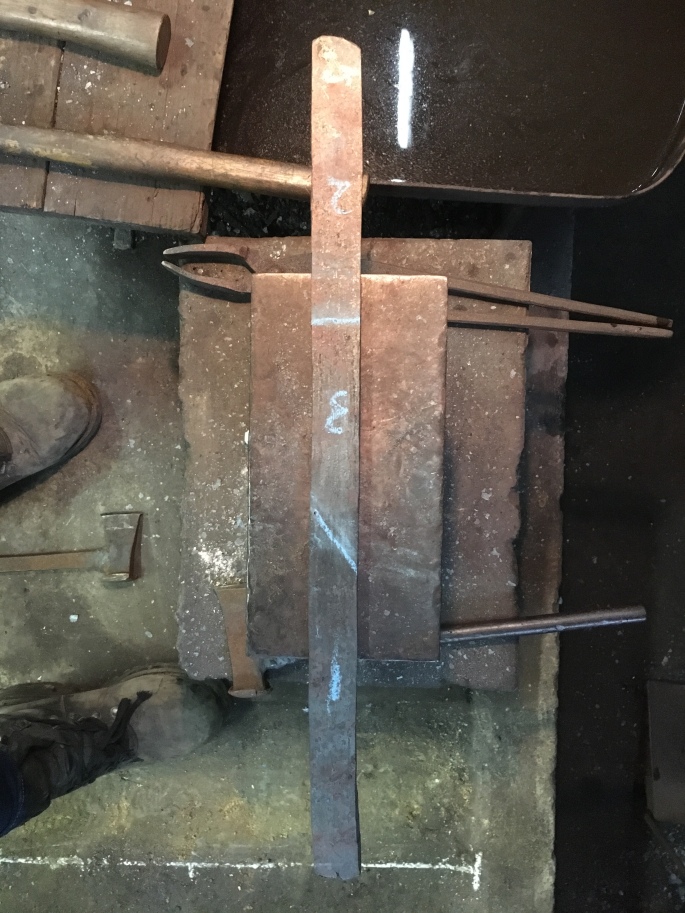
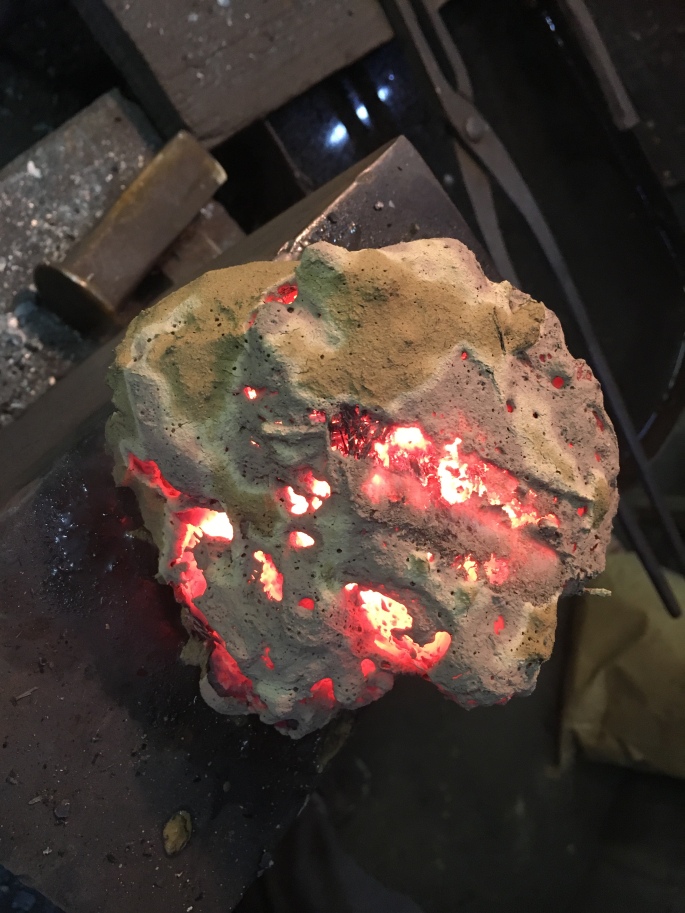
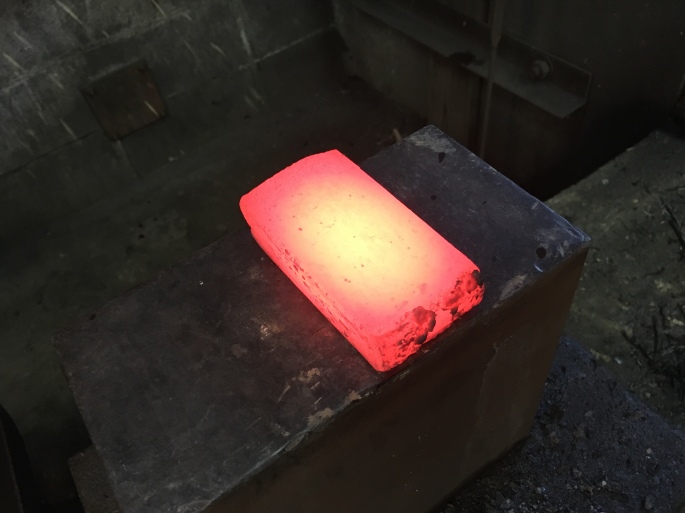
 After a lot of re folding and fire welding I have got two pieces of useable steel bar from the smelted Iron sand bloom. One is 1.1kg and the other 1.3kg (There are also a few large pieces of bloom left from my smelt which I will consolidate if I have some time let at the end .)